Procedure: How to Change Your Monitor's Refresh Rate
Have you ever noticed that motion on your computer screen doesn't look as smooth as it could, especially when playing games or watching fast-paced videos? One setting that can make a big difference is your monitor's refresh rate. Many people, especially those less familiar with computer settings, might overlook this, potentially missing out on a better visual experience.
What is Refresh Rate?
Think of refresh rate as how many times your monitor updates the picture on the screen every second. It's measured in Hertz (Hz). A standard monitor might be 60Hz, meaning it refreshes the image 60 times per second. However, many modern monitors, especially those designed for gaming, can support higher refresh rates like 120Hz, 144Hz, or even more. A higher refresh rate generally results in smoother-looking motion because there are more frames displayed each second, making movements appear less blurry or choppy.
If you have a monitor capable of a higher refresh rate, Windows might not automatically use the highest setting. Checking and adjusting it can significantly improve how smooth things look on your screen. It's a simple change that can have a noticeable impact!
Steps to Change Refresh Rate (Windows 10/11)
The steps are very similar for both Windows 10 and Windows 11. Don't worry, it's easier than it sounds! Follow the steps below (click images to enlarge).
Right-click on your Desktop
Find an empty area on your main computer screen (your desktop background) and click the right mouse button. A menu will pop up.
Select 'Display settings'
Look for an option called "Display settings" in the menu and click on it with the left mouse button. This will open the main display configuration window.
Scroll down to 'Advanced display settings'
In the window that opens, scroll down using your mouse wheel or the scroll bar on the side. Near the bottom, you should find a link or option called "Advanced display settings" (it might just say "Advanced display" in Windows 11). Click on this.
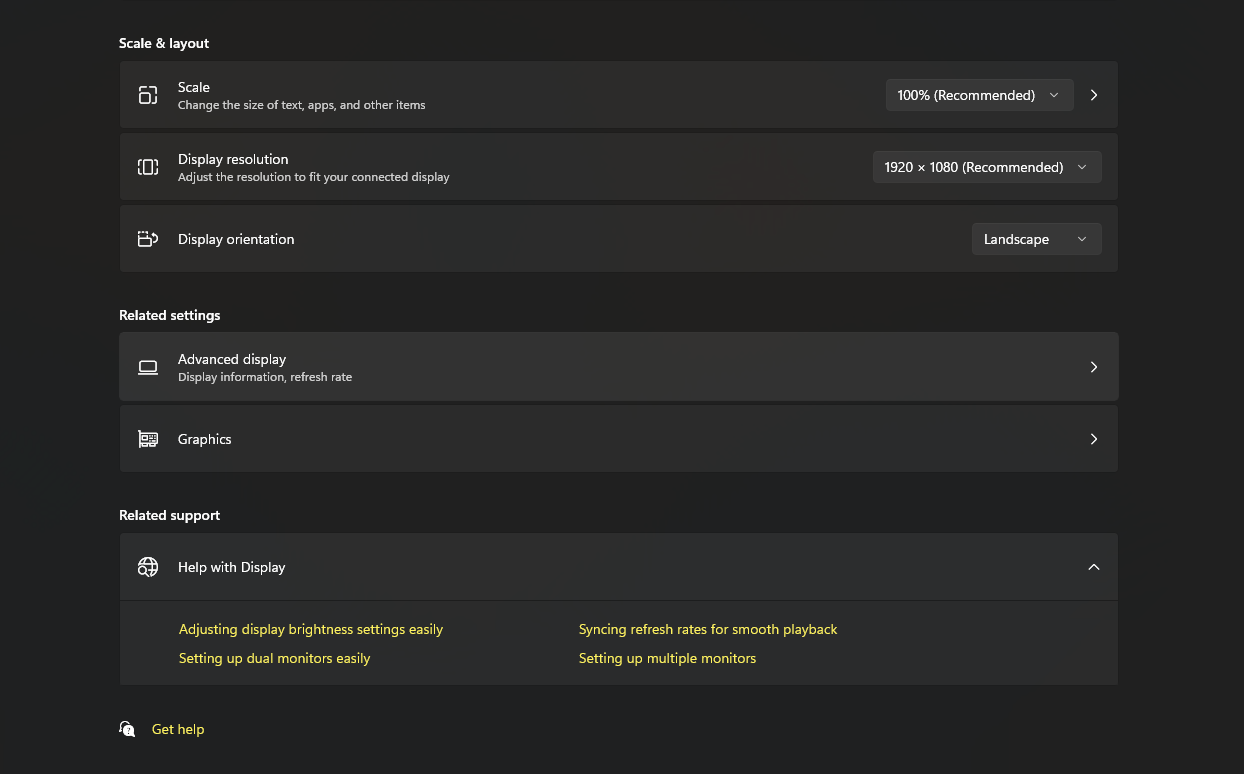
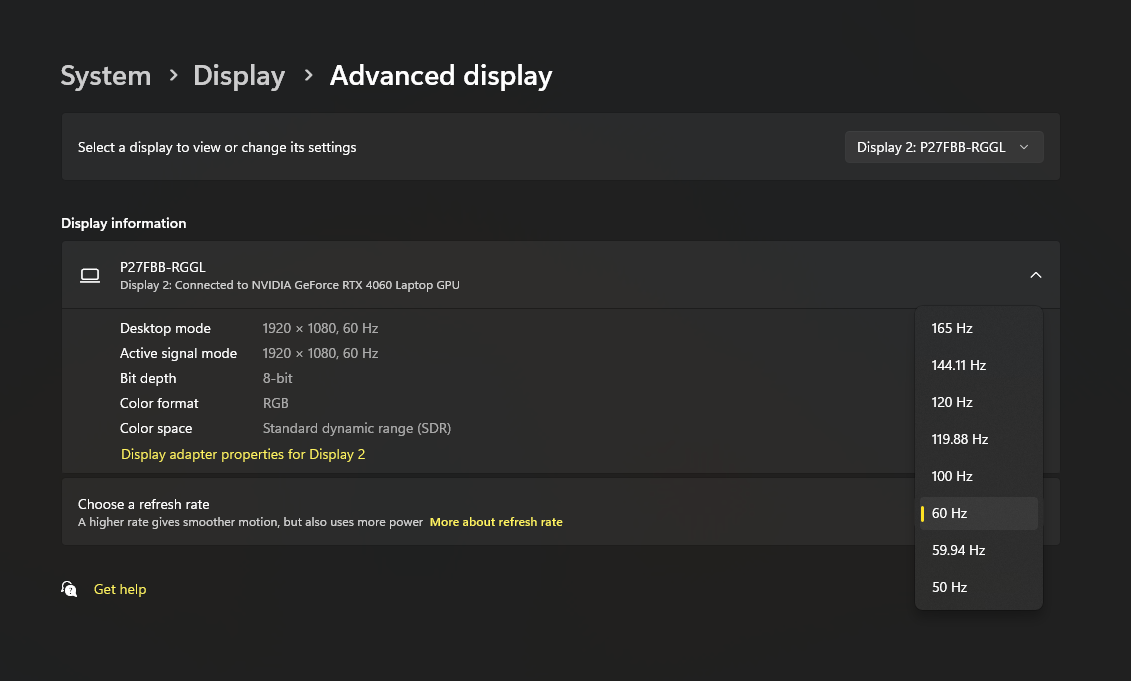
Choose the correct monitor
If you have multiple monitors connected, make sure the correct one is selected at the top of this new screen. It usually shows the monitor's name (e.g., Monitor 2: P27FBB-RGGL).

Find the 'Refresh rate' setting
Look for a dropdown menu labeled "Refresh rate" (Windows 11) or "Choose a refresh rate" (Windows 10). It will show the currently selected rate (e.g., 60 Hz).
Select the highest available rate
Click on the dropdown menu. You'll see a list of refresh rates your monitor supports. Click on the highest number available (e.g., if you see 60 Hz and 144 Hz, choose 144 Hz).
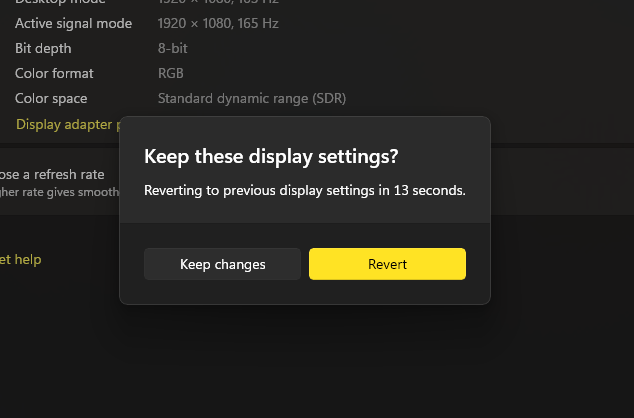
Confirm the change
Your screen might go black for a second or two as it applies the new setting. A confirmation box will likely appear asking if you want to keep these display settings. Make sure everything looks okay, and then click "Keep changes". If the screen looks strange or stays black, don't worry – just wait about 15 seconds, and it should automatically revert to the previous setting.
That's it! You've successfully checked and potentially increased your monitor's refresh rate. Enjoy the potentially smoother visuals!